Designing a parcel box in Blender, one Python script at a time
We need somewhere by the front door for couriers to leave parcels, mainly so they don’t get soaked when it rains. I also have a pile of reclaimed decking boards (25 × 145 mm) and some 45 × 45 mm framing timber. So the brief wrote itself: a wooden chest, out of what I’ve already got, sized for boxes rather than bottoms. Its cut list says it in so many words: “Not a seat: a parcel box.”
Rather than draw it, I let Claude model it in Blender with a Python script. The whole thing was Claude’s show, and a chance to see what Fable 5.1 could do at 3D modelling. Every board is a named box of the real size, and the whole model is rebuilt from a few numbers at the top: the clear width inside, the gap to the wall and how far the lid opens. That matters with reclaimed timber. The boards are the size they are, so the design has to fit round them rather than the other way round.
Four ideas
The script can build four designs for the same corner, and it renders each one closed and open:
- a bench chest: a hidden frame, horizontal boards and a hinged lid;
- a frame chest: an exposed 45 × 45 frame with vertical boards set into it;
- a cabinet with double doors and an overhanging top;
- a raised chest on short legs, with a slatted shelf underneath for boots.
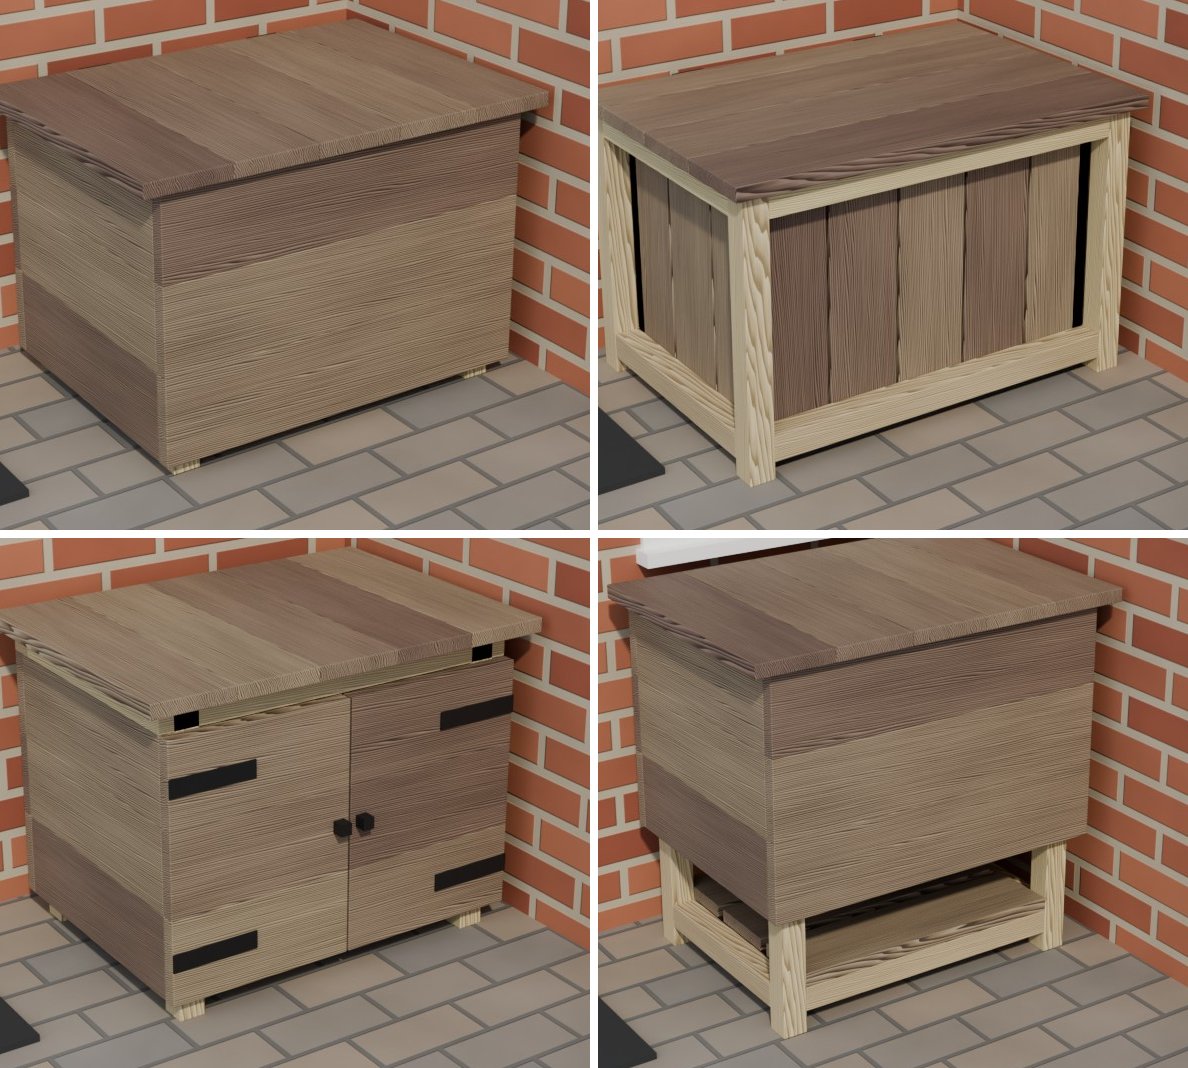
The bench chest won. It looks good, and it’s the simplest to build, which matters for a novice woodworker like me.
The details that came out of it
Modelling it properly, rather than sketching it, forced a few decisions that would otherwise have waited until I was standing over it with a saw:
- The lid falls to the front. The two top bearers are ripped on a taper, from 25 mm at the back to about 2 mm at the front, so rain runs off the front of the lid instead of pooling on it.
- The hinges sit at the top back edge. The chest stands 60 mm off the wall. With the hinge knuckle on the top back corner of the lid, everything on the lid is below and in front of the pivot, so nothing swings behind the box when it opens. It stops at about 88° on a stay, which is as far as a lid against a wall can go.
- Cover strips over the lid joints. Five boards make the lid, and the gaps between them are exactly where water gets in. Each joint gets a strip ripped from the same decking and rounded to a near half-round, bedded on a bead of sealant on the weather side only.
- The grooves face the right way. Decking has ridges on one face. If you put the grooves inside and butt the corners together, each groove becomes a little channel straight into the box. So it’s either rebate the ridges off where the side boards land, turn the grooves outwards, or mitre the corners.
- No glue where the wood needs to move. Exterior PVA goes on the skirt corners only. The cladding, floor and lid boards are just screwed, so they can swell and shrink with the weather.
The finished size is 600 × 440 mm inside, 365 mm deep at the front, with 510 × 350 mm clear between the posts so nothing gets in the way of a box.
Build steps and a cut list
The same model also produces the instructions. A second script builds the chest piece by piece in assembly order and renders each stage: the corner posts, the floor rails, the floor, three rows of cladding, the top bearers, the skirt and the lid.
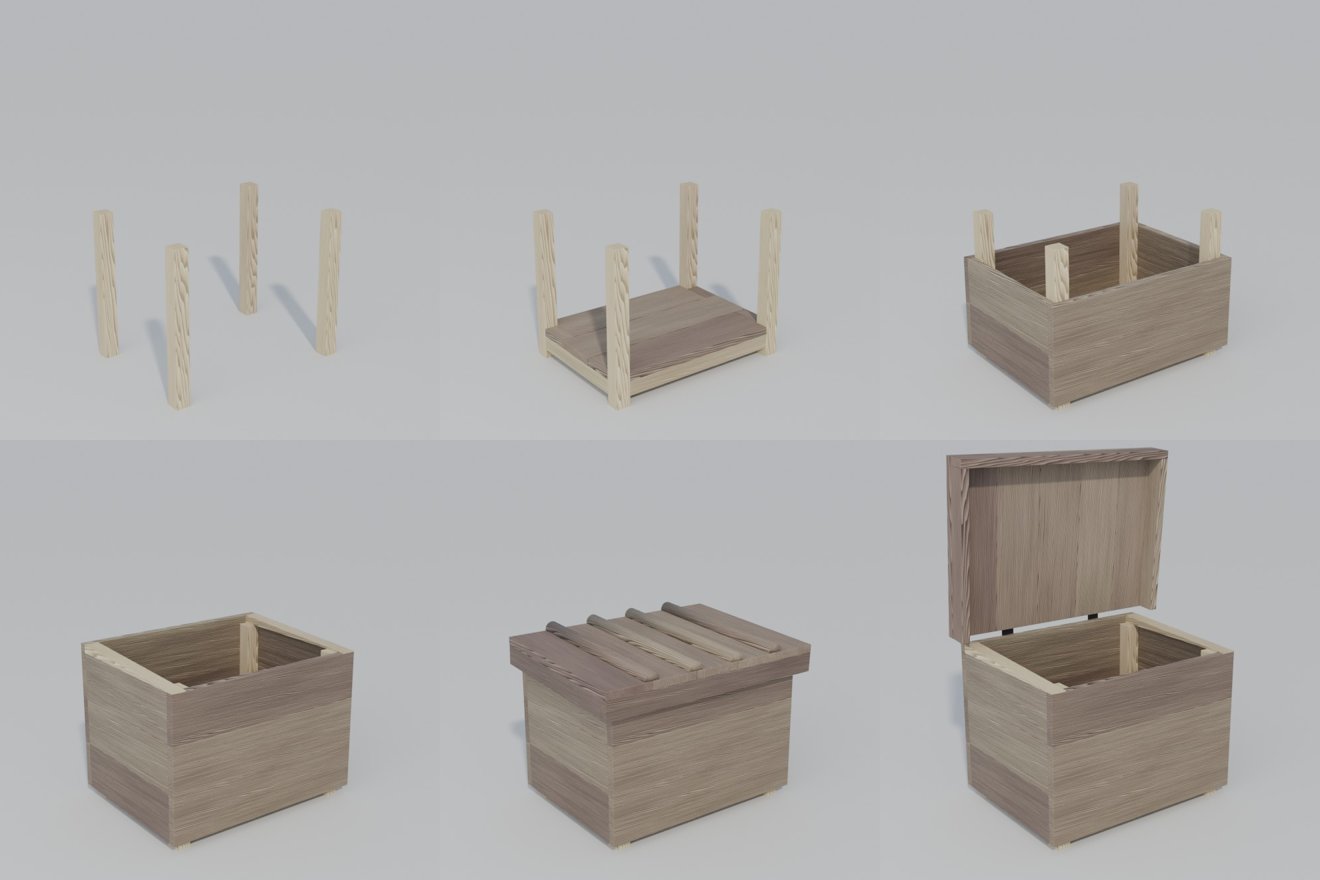
It also makes an animation of the whole build, which predates the cover strips:
The model also writes out the dimensions and cut list for each design. The final list is 20 full-width decking pieces, 8 rips and 4.5 m of framing. The full-width pieces come to just under 11 m, and the rips need about another 2.3 m of board, which packs into seven 2.4 m boards. The only long pieces are the 725 mm skirt and the 650 mm cladding boards, so shorter reclaimed lengths will do for everything else. It lists the screws too: 16 long ones for the frame joints, about 120 shorter ones and around 24 through the lid. The hinges get 25 mm stainless countersunk screws rather than the ones in the pack, because the lid and the filler behind it are only 25 mm thick.
Where it stands
As of today it’s a design, a set of renders and a cut list. Building it is on the long list of things to DIY!
Project assisted by Claude Code.